
LIFE STYLE
Photeeq Lens Flare: Enhance Your Photos with Light 2025

Introduction to Photeeq Lens Flare
Photography is often described as the art of painting with light. Without light, there is no image—and with the right kind of light, a simple photograph can transform into a breathtaking story. One of the most visually striking ways to use light in editing is through lens flare effects.
While lens flares occur naturally when light scatters inside the camera lens, they aren’t always easy to capture perfectly in-camera. This is where Photeeq Lens Flare becomes a game-changer. It allows you to enhance your photos with light by adding realistic, cinematic flares directly within Photoshop and Lightroom.
What is Photeeq Lens Flare?
Photeeq Lens Flare is a creative plugin designed for photographers and digital artists who want to bring extra drama, mood, and realism to their photos. It integrates smoothly into Adobe Photoshop and Adobe Lightroom, giving users access to pre-designed light effects and customizable options.
Whether you’re a beginner experimenting with presets or a professional seeking high-end retouching tools, Photeeq caters to both with ease and flexibility.
Why Use Lens Flare in Photography?
Lens flare isn’t just a visual gimmick—it adds meaning and style to photos. Here’s why many photographers use it:
-
Cinematic Appeal: Flare creates that movie-like atmosphere, adding instant drama.
-
Depth & Realism: It gives a photo a more natural, lived-in look by simulating real-world lighting. Tools like the End Zone Camera System can help capture flares more effectively by providing precise angles and lighting setups.
-
Emotional Impact: Warm, glowing flares can make images feel romantic, nostalgic, or adventurous.
Key Features of Photeeq Lens Flare
-
Realistic Simulation: Replicates natural sunlight, neon, or artificial light.
-
Easy Presets: One-click solutions for fast editing.
-
Customizable Controls: Adjust brightness, hue, saturation, and placement.
-
High-Resolution Output: Works for large-scale projects without losing quality.
-
Cross-Platform Integration: Compatible with Photoshop and Lightroom.
Installing Photeeq Lens Flare
For Photoshop
-
Download the plugin package from Photeeq’s official source.
-
Extract and copy files into the Photoshop “Plugins” folder.
-
Restart Photoshop to activate the tool.
-
Access it via the Filters or Extensions menu.
For Lightroom
-
Download the Photeeq preset pack.
-
Open Lightroom → Preferences → Presets.
-
Click Import Presets and upload the Photeeq folder.
-
Start editing with the new presets in the Develop panel.
How to Use Photeeq Lens Flare in Photoshop
-
Open your photo in Photoshop.
-
Go to the Photeeq Plugin option under extensions.
-
Select a preset or create a custom flare.
-
Adjust angle, brightness, and scale until it matches your scene.
-
Use masks and blending for natural integration.
How to Use Photeeq Lens Flare in Lightroom
-
Import your image into Lightroom.
-
Choose a Photeeq preset from the Develop panel.
-
Adjust exposure, warmth, and highlights to balance the flare.
-
Save custom settings as your own presets for future edits.
Enhancing Portraits with Photeeq Lens Flare
Portraits come alive when combined with subtle flare effects.
-
Add soft glows around hair highlights.
-
Use warm light to create a romantic, dreamy mood.
-
Place subtle lens flares behind the subject for cinematic backlighting.
Using Photeeq Lens Flare in Landscape Photography
Lens flare adds depth and atmosphere to landscapes.
-
Simulate golden hour sunlight in morning or evening shots.
-
Add glowing highlights to mountain tops or beaches.
-
Bring extra warmth to sunset and sunrise photos.
Photeeq Lens Flare for Travel Photography
Travel photography is all about storytelling, and flares enhance the narrative.
-
Make street photography feel alive with glowing lights.
-
Highlight landmarks with dramatic skies and sun flares.
-
Add a sense of adventure in hiking and outdoor shots.
Creative Applications of Lens Flare
-
Cinematic Style: Give your photos a film-inspired look.
-
Vintage Edits: Add retro light leaks for a nostalgic vibe.
-
Social Media Aesthetic: Make Instagram and TikTok posts stand out with glowing, dreamy effects.
Photeeq vs Other Lens Flare Plugins
| Feature | Photeeq | Nik Collection | ON1 Effects |
|---|---|---|---|
| Ease of Use | Beginner-friendly | Complex | Moderate |
| Presets | Wide variety | Limited | Good |
| Realism | High | Medium | High |
| Price | Affordable | Higher | Moderate |
Photeeq strikes the right balance between ease of use and professional output.
Professional Tips for Realistic Lens Flare
-
Match the flare with the actual light source in the image.
-
Use blending modes like Screen or Overlay in Photoshop.
-
Keep edits subtle—overdone flares look artificial.
Common Mistakes to Avoid with Lens Flare
-
Overuse: Too many flares overwhelm the subject.
-
Incorrect Placement: A flare must align with the light source.
-
Color Mismatch: A warm flare on a cool image feels unnatural.
System Requirements for Photeeq
-
Photoshop: CC 2018 or later.
-
Lightroom: Classic CC or later.
-
OS: Windows 10/macOS Mojave or newer.
-
RAM: 8GB minimum, 16GB recommended.
Troubleshooting Photeeq Installation Issues
-
Plugin Not Appearing: Reinstall to the correct folder.
-
Software Crash: Update Photoshop/Lightroom.
-
Missing Presets: Re-import from the original download.
Photeeq Preset Collection
-
Cinematic Glow – perfect for movie-style portraits.
-
Warm Sunlight – ideal for outdoor golden hour shots.
-
Urban Night Lights – adds city-inspired neon flares.
Photeeq for Social Media Creators
-
Instagram: Make posts visually stunning.
-
YouTube Thumbnails: Add drama for higher clicks.
-
TikTok/Reels: Use flares for engaging, eye-catching visuals.
Is Photeeq Lens Flare Worth It?
Yes—if you value speed, realism, and creativity in your photo editing. Beginners will love the presets, while professionals can push the customization to suit commercial work. For its price and versatility, Photeeq offers excellent value.
Future of Lens Flare Plugins
-
AI Integration: Automated detection of natural light sources.
-
Dynamic Adjustments: Real-time flare simulation during editing.
-
Greater Realism: Ultra-HD rendering for professional projects.
Conclusion
The Photeeq Lens Flare Effect is more than just an editing tool—it’s a creative ally that helps you enhance your photos with light in powerful, artistic ways. Whether you want cinematic portraits, dreamy landscapes, or scroll-stopping social media content, Photeeq delivers both speed and quality. If your goal is to make your photos shine, Photeeq is a must-have addition to your editing workflow.
FAQs about Photeeq Lens Flare
Does Photeeq work with RAW files?
Yes, Photeeq supports RAW files for maximum image quality.
Can beginners use Photeeq Lens Flare easily?
Absolutely—presets make it beginner-friendly.
Is it compatible with Lightroom Mobile?
Currently, Photeeq works with desktop Lightroom Classic only.
Can I create custom presets in Photeeq?
Yes, you can save your own edits for future use.
What genres of photography benefit most from lens flare?
Portrait, travel, and landscape photography gain the most impact.
Does Photeeq slow down Photoshop or Lightroom?
On modern systems, performance remains smooth with minimal lag.
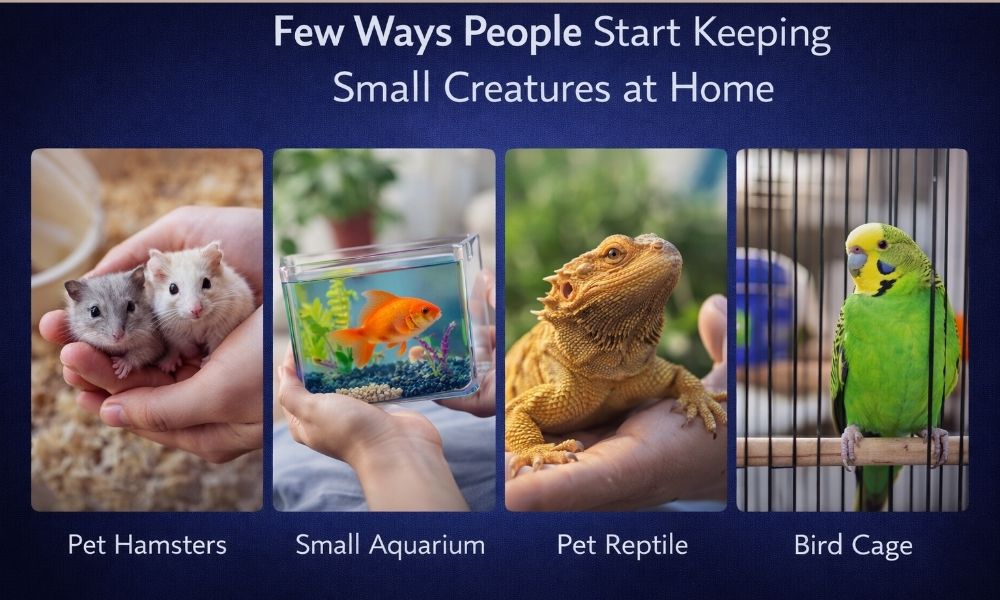
Keeping small pets is not something most people plan from the beginning. It usually starts with a random moment. A video, a photo, or someone talking about it. Then curiosity builds. At some point, people casually check inverts for sale uk options just to see what is available, not even thinking they might actually start.
Getting comfortable with small pet choices
Initially, it is strange. The majority are accustomed to dogs, cats or birds. Little animals are not the same. They do not respond in a similar manner. They do not express love in blatant forms.
That is also what makes them interesting. Thou sees more. You observe minor details. And gradually that indecision begins to dissipate.
Even after purchasing their first one, some of them still feel uncertain. The feeling lingers momentarily.
Why many people prefer low space pets
- Space is one of the biggest reasons people choose them.
- Not everyone has the room or time for larger animals. Small setups fit easily into daily life. A shelf, a table, or even a quiet corner works fine.
- And honestly, once it is set up properly, it does not take much effort to maintain.
- There is also less noise, less movement. For some, that is exactly what they want.
Setting up a small living environment
The setup part is where most people spend time in the beginning.
It does not have to be complicated, but it needs some thought. The basic idea is simple:
- A container that is secure
- Enough airflow
- A base layer like substrate
- A place where the creature can hide
Still, the first setup is rarely perfect. People adjust things later. Sometimes they change everything after a few days.
That trial and error phase is part of it.
How people slowly build interest
- It rarely stays at one.
- People say they will keep just a single one, but then they start comparing. Different sizes, different behaviors.
- And that curiosity grows quietly. No sudden jump. Just small steps.
- Sometimes they even start reading more, watching more, thinking about better setups and that is when things begin to change.
Creating a simple setup that actually works
Setting up a small habitat sounds easy, but small details change everything. Most people begin with a basic container, thinking that is enough. It works for a while, but then they notice small issues. Maybe it feels too dry. Maybe there is not enough airflow. These things are not obvious at first.
So people start adjusting slowly. Adding a better base layer, making small holes for ventilation, placing a hiding spot where the creature feels secure. It is not about making it perfect. It is more about making it comfortable over time.
Once the setup feels stable, everything else becomes easier. Feeding, observing, and even cleaning feels less stressful. It all starts to fall into place without much effort.
How interest grows without people noticing it
At the beginning, it feels like a one time thing. Just trying something new. Nothing serious.
But after a few days, people start checking more often. Just quick looks at first. Then longer observations. They notice movement, small patterns, changes in behavior. It becomes quietly interesting.
And then, without planning it, they start thinking about adding another one. Not urgently. Just a thought.
Sometimes they even tell themselves they will stop at one. But that rarely lasts. The curiosity builds slowly.
Different species, different behaviors, different setups. Each one adds something new to the experience.
It does not feel like a big hobby. It feels small, simple, almost casual. But it stays.
Not perfect, but manageable. And when that happens, many people go back and look at inverts for sale uk again, but this time they are not just browsing. They know what they are looking for. That quiet shift makes a difference. It no longer feels new. Just something they got used to, without really noticing when it happened.

Extra humidity in your home leads to mold growth, structural damage, and bad air quality. A smart dehumidifier prevents all of that automatically.
Program it correctly, and it only runs when needed to reach your desired humidity level every day while saving energy. This guide covers how to automate humidity control from beginning to end.
Why You Should Automate
Manually controlling a dehumidifier is a waste of time. You forget to turn it on when you need it or leave it running way too long after the air is dry. Either scenario wastes energy or shortens the appliance’s lifespan.
With automation, your dehumidifier responds to actual humidity levels in your home. It turns on when needed to lower moisture and automatically shuts off once the air is back to your desired humidity level. You don’t have to think about it.
The Environmental Protection Agency (EPA) recommends running your indoor humidity levels between 30% and 50%. More than 60% is ideal for mold growth. Below 30% and your air is too dry. Itchy skin and sinus irritation are common at low humidity levels. Automation helps maintain that ideal range.
Equipment Needed
Ensure you have the proper equipment before getting started. Every setup varies slightly, but you will need:
- Smart dehumidifier connected to Wi-Fi OR standalone dehumidifier plugged into smart plug
- Separate humidity sensor (optional but useful if monitoring a large room)
- Smartphone app compatible with your devices
- Wi-Fi router connected to 2.4 GHz (not 5 GHz)
Step 1 – Connect to Your App
The first step is downloading the app that controls your smart dehumidifier. Many smart dehumidifiers are compatible with Android phones and iPhones.
Launch the app on your phone and create an account if you do not have one already. Once that is complete:
- Hold the UP and DOWN buttons simultaneously for 3-5 seconds until you hear a beep. On most models, this puts your dehumidifier into pairing mode. You will know it’s working when the Wi-Fi button starts flashing.
- Open your smart dehumidifier’s app and look for an option that says, “Add Device.”
- Pick your home’s Wi-Fi network from the list. Connect to the 2.4GHz network, not 5GHz.
- Allow the app to complete its setup. You should see a confirmation that the device connected.
If it doesn’t connect, unplug your dehumidifier and try again. Also, keep your phone close to your wireless router while pairing. Consider purchasing a Wi-Fi extender if you plan to use this device in your basement or another room with spotty Wi-Fi. Smart homes rely on this connection.
Step 2 – Select Your Humidity Preference
Once you pair your device, set your desired humidity level. This is the ideal room humidity percentage your system will maintain.
EPA guidelines say between 45% and 50% is ideal for most homes. Basements hold more moisture than other rooms, so keep it around 45%. Set bedrooms and living areas a little lower or higher at 40-55% for best comfort.
Look for a setting in your app that says, “Humidity Target,” “Set Point,” or “Dryness Level”. Input your desired humidity level and save. Your system will now work towards maintaining this level automatically.
The Heater Shop from the UK noted that advanced dehumidifiers like the AC Infinity Hydrone even have artificial intelligence (AI) mode. It studies humidity trends over time and automatically adjusts its settings to prevent humidity from spiking. AI mode is beneficial if your space has rapidly changing moisture levels.
Step 3 – Adjust Your Humidity Triggers
We mentioned triggers help determine when your device should turn itself on and off. Most apps allow you to set upper and lower thresholds.
Set your device to activate when humidity exceeds 60% but turn off once it hits 45%. That gives your dehumidifier a range of 15 points to maintain before turning off. If the points are too close together, your dehumidifier turns on and off too frequently. It wastes energy and stresses the fan.
This range between turning on and off is called hysteresis. Ideal hysteresis range is between 5-10%. Too low, and your device turns on/off too frequently. Too high and the humidity will swing more than you want.
Home Assistant users can skip app configuration and input these details yourself. Using your home’s humidity sensor data, you can configure a component called “generic hygrostat.” It allows you to set your own humidity high and low triggers.
Step 4 – Create a Running Schedule
Triggers cover sudden rises in humidity. Scheduling your device for optimal run times saves you even more money. Your system can’t run when it’s not allowed to, even if the humidity is too high.
Your dehumidifier probably doesn’t need to run at night. Unless you live in a very humid climate, humidity increases when you shower, cook, or during the hotter afternoon hours. Set your system to run anytime during these periods and stay off when you don’t need it.
Locate “Schedule” or “Timer” in your app. Set available run times in 30-minute or 1-hour increments. We recommend leaving it available from morning to night. For example, from 7 AM – 10 PM. You can adjust it as needed later if your device runs too frequently or not enough. Outside of those times, your device will stay off no matter how humid it gets.
Step 5 – Configure Smart Home Integrations
Both Alexa and Google Home allow you to create routines. These are customized commands that control smart devices using one command. You can tell Alexa to “turn on dehumidifier” or include it in your goodnight routine that runs when you tell your smart home you’re going to bed.
IFTTT (“If This Then That”) is another excellent service to look into. If you connect your dehumidifier using IFTTT, you can tie its actions to other apps you use. Set your dehumidifier to turn on if your weather app detects high humidity levels in your area.
Step 6 – Observe and Refine
Wait one week then analyze results. Review your app’s history logs to see when and how often your device ran. If it’s too much, increase your trigger point. If humidity is still getting too high, lower your humidity target level.
You can usually view usage logs, energy consumption, and filter change reminders through your app as well. Review these monthly to ensure everything is functioning correctly.
If your device offers the ability, turn on notifications for when the water tank becomes full. The dehumidifier automatically powers off if it fills. When you are away from home, that could cause humidity to spike until you return and notice. Get a notification when your tank is full and empty it right away.
Automatic Humidity Control Done Right
Setting up your smart dehumidifier should not take more than 30 minutes. After you connect it to your smartphone and enter your preferred humidity levels, automating the rest is easy. Add triggers and a schedule before connecting it to your smart home system. Your house stays dry, your humidity stays consistent, and you save money all year long.
Humidity Case Study: Helping our Customers Keep Their Homes Humidity-Controlled
CLIENT: 4-bedroom house in the suburbs
ISSUE: Constant damp basement and stuffy bedrooms cause mold, mildew smells, and poor sleep.
HOW WE FIXED IT:
- Installed Wi-Fi smart dehumidifiers with humidity sensors in basement, bedrooms, and utility room
- Programmed desired humidity range between 40–50% with auto-on alerts at >55%
- Installed fans to move air throughout rooms for quicker drying
- Paired dehumidifiers with HEPA air purifiers for air quality and odor control
WHAT WE DID:
Equipped basement rooms and laundry rooms with 50-pint LGR dehumidifiers, meant for more damp/cooler areas
Installed silent or quiet mode 30-pint dehumidifiers with a night mode option in bedrooms
Controlled humidity levels remotely with smartphone app integration. Automated run times & received alerts when each dehumidifier’s tank was full.
WHAT HAPPENED:
- Within 72 hours, home’s humidity was maintained between desired levels
- Mold and mildew were eliminated from recurring problem areas
- Our client’s allergies were greatly reduced (especially dust mites)
- Smart controls allowed homeowners to decrease energy consumption by not over-running units.
Moral of the story: Running your dehumidifier with maximized airflow and consistently monitoring humidity levels allows for quicker drying times and better air quality with less hands-on time.
Study: https://ijrpr.com/uploads/V5ISSUE2/IJRPR22481.pdf
Dehumidifier FAQs
What is the ideal home humidity level I should keep?
We recommend 40–50% relative humidity. Lower humidity will eliminate mold & dust mites. Higher humidity keeps your home comfortable while limiting other allergens like pollen.
Will a dehumidifier help with my allergies?
Absolutely. Dehumidifiers keep humidity levels low to prevent dust mites and decrease mold spores which are known to trigger asthma and allergy symptoms. Try pairing your dehumidifier with an air purifier with a HEPA filter!
Do I need a smart dehumidifier?
A regular model will suffice for small spaces with moderate humidity. Smart dehumidifiers can be programmed for hands-off control and are best used for larger areas, whole-home systems, or rooms with extreme changes in humidity. Smart dehumidifiers also conserve energy by limiting run time.
How do I know what size dehumidifier to buy?
It depends on how large the space is and how much humidity you wish to remove.
Humidity is HIGH:
- Small rooms – 30-pint dehumidifier
- Large bedrooms or basement – 50-pint dehumidifier or higher
- Whole-home or commercial use – 70 – 200+ pints
Humidity is Moderate:
- Stick with a 30-pint dehumidifier.
Can I leave my dehumidifier on all day?
If your dehumidifier has a built-in humidistat or can be programmed smartly, then you can! A humidistat will allow the dehumidifier to sense when it reaches your desired humidity level and shut off to prevent your home from drying out too much. Running your unit continuously will also increase energy costs.
Where should I place my dehumidifier?
Dehumidifiers should always be at least 12″ from walls/furniture. You can place your dehumidifier in the center of a damp room or close to the area that is most affected by humidity. If you have a large room with multiple areas being affected by humidity, we suggest purchasing more than one dehumidifier or placing a fan in the room to allow for better circulation.
Is it necessary to clean my dehumidifier?
Yes. Regularly empty the water tank or drain if necessary. Most units have disposable filters, so clean those every 2 weeks. Lastly, you’ll want to wipe down the coils once a year to prevent mold or bacteria from growing inside your dehumidifier.
Should I run my dehumidifier year-round?
Yes! Dehumidifiers are great for helping you remove excess moisture in the hot & humid months. But did you know that many LGR or desiccant dehumidifiers can run during cooler months as well?

Most people do not consider the issue of dealing with used needles until the time when they have to. This article describes how virginia sharps disposal is done in practice particularly by individuals taking care of patients at home or in small clinics.
Sharps waste consists of objects that can cut the skin. That is easy to say, and in reality, human beings tend to procrastinate or avoid addressing it. And there the little dangers creep in.
What Sharps Really Means In Daily Life
Sharps in simple terms are those that cut or pierce. But when you see them every day, they become normal.
Some of the typical cases that people have to deal with:
- Needles of insulin daily.
- Blood sugar testing lancets.
- Post-medication injection syringes.
- Minor medical blades in certain instances.
It may not look like much. Just one or two items a day. However, they accumulate in the long run.
Why People Should Not Ignore Proper Disposal
People simply take a needle and dispose of it sometimes. It feels quick and done.
However, there is where the issue begins. It may appear covered but may still be harmful. A person who will later deal with waste may not even see it.
And, and the truth is, the majority of people do not consider that far. It is not necessarily the matter of carelessness. It is simply something that they are not accustomed to.
The Everyday Reality At Home
Home care has changed a lot. A lot of the treatments that used to be done at the hospital are now done in the bedroom or the kitchen.
Thus people find themselves operating on things such as:
- Daily injections
- Blood testing routines
- Long term medication use
And responsibility comes with it. Not heavy, but still there.
It seems to me sometimes like an addition to an already full day. And that is most likely the reason why people postpone it.
Containers That Actually Make Life Easier
This is a section that is neglected. Human beings attempt to utilize what is in their proximity.
Plastic bottles, used boxes, even bags.
It works for a short time. But not always safe.
This is the reason why proper sharps containers are created. They are not easily broken and can be closed up. That in itself mitigates a great deal of risk.
And when you begin to use one it really is easier. No second guessing.
Small Mistakes That Happen Without Notice
They do not always get it right. And that is okay.
But these are things that occur more frequently than one thinks:
- Over stuffing the container.
- Leaving needles uncapped
- Leaving unsealed prior to disposal.
- Storing containers in open spaces.
None of them seem big mistakes. However, when combined they can cause unsafe situations.
Where People Usually Get Stuck
The greatest misunderstanding is not on storing sharps. It is about what to do next.
Where do you take it
Who accepts it
The frequency of disposition should be how often.
These are the questions that remain in the mind. And occasionally individuals simply hold on to the container than they ought.
Not because they want to. Just because they are unsure.
Making It Part Of Routine Without Thinking Too Much
When it becomes a routine, then it ceases to be effort.
To help, a few easy habits will be:
- Store the container near sharps usage.
- Dispose of material right after use.
- Inquire about local disposal every now and then.
Do not wait till the jar is full.
And with time it is automatic. Nearly as any other day ritual.
Sharp management is an easy task, but it is not an easy task either. It sits somewhere in between.
Some days you may forget. There are days when you can do it perfectly. That is normal.
Nevertheless, in the case of the virginia sharps disposal, a little bit of consciousness and caution helps.
A Few Quick Questions That Come Up Often
Can I reuse a sharps container?
Usually no. The majority of them are single use and safe sealing.
Is it okay to store it for a long time?
Not really. Disposing of it when it is full is better.
Do small homes really need proper disposal?
Yes, even little things count.
What if I miss one or two steps?
It happens. Simply attempt to remain steady in the future.

A Beginner’s Guide to the World’s Leading Cryptocurrency Exchange

Dental Express Santee: What Patients Should Know Before Choosing a Local Dentist

Best AI Face Swap Tools in 2026 for Realistic Photos, Videos, and Content Creation

anonposted Explained: Features, Privacy, Uses, and What Users Should Know

Who Is Amelia Jane Henson? Everything You Need to Know About Mia Sara and Brian Henson’s Daughter

Who Is Nadia Farmiga? Everything You Need to Know About Vera Farmiga’s Sister
-
 TECH4 months ago
anonposted Explained: Features, Privacy, Uses, and What Users Should Know
-
 CELEBRITY1 year ago
Who Is Amelia Jane Henson? Everything You Need to Know About Mia Sara and Brian Henson’s Daughter
-
 BUSINESS1 year ago
Who Is Nadia Farmiga? Everything You Need to Know About Vera Farmiga’s Sister
-

 CELEBRITY1 year ago
Who Is Joe Alfie Winslet Mendes? Everything You Should Know About Kate Winslet’s Son
-

 CELEBRITY1 year ago
Who Is Rosemary Margaret Hobor?: Everything You Need to Know About John Candy’s Wife
-

 CELEBRITY1 year ago
Who Is Jasmine Gong? Everything You Should Know About Brad Williams’ Wife
-

 CELEBRITY1 year ago
Matt Danzeisen: The Influential Yet Low-Key Force Behind Peter Thiel’s Success
-

 CELEBRITY1 year ago
Rachel Catudal: Everything You Need to Know About Brandon Quinn’s Wife